The DIY Guide to Marble Effect Nails
Marble nails are having a major trend moment. It’s safe to say they’re not going anywhere anytime soon. They’re a simple design with a dash of elegance, resembling the beautiful swirls of marble rock that can be achieved with any manicure type. Regular, gel, or acrylic marble effect nails are a fast-track way to getting Instagram-worthy nails—and it’s not too difficult to do at home! Follow this cheat sheet for how to marble nails three different ways.
Table of Contents
What are marble nails?
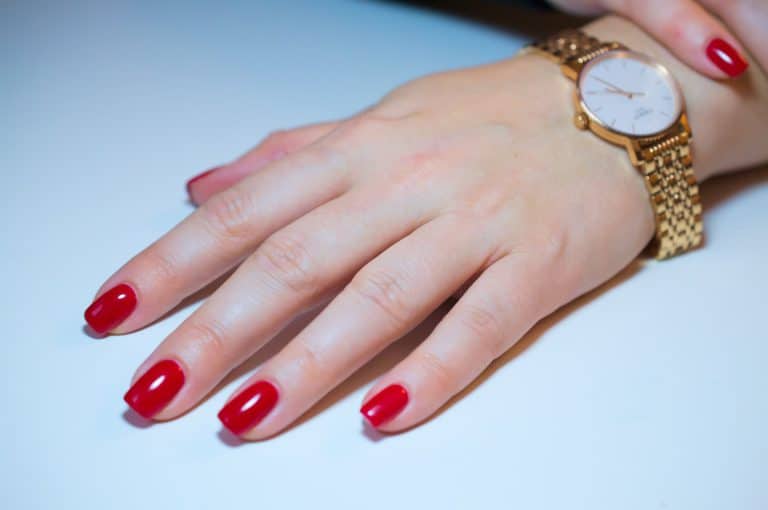
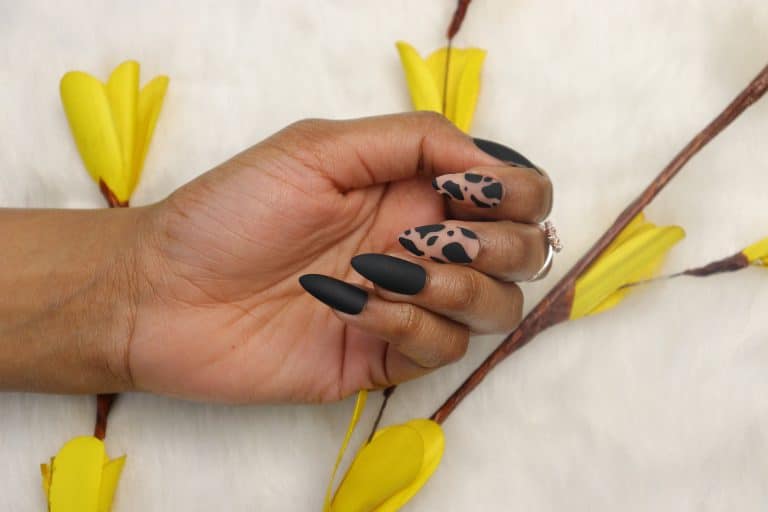
All eyes are on marble effect nails, but this isn’t their first time in the spotlight. This technique has been at the forefront of nail trends before, and it’s no surprise why it always comes back. The classic marble nails look is refined and luxurious. Its distinctive swirl-like marbled pattern was most often done in white or black in previous trend cycles. But now, marble nails back with even more fun renditions that stray away from classic marble colorways. This time around, we’re seeing everything from bright hues like lilac marble nails to matte finishes.
Marble nails aren’t limited to one technique. You can use a few different methods to create the marble effect. The type of manicure you choose can clue you in on which approach to take. Decide between regular, gel, or acrylic nails first. Then, use the corresponding marble nails guide below to learn how to create beautiful marble nails step-by-step.
Marbling with nail polish
The water marble technique was the DIY marbling method that first took the world by storm. Expert-level nail art skills aren’t necessary here, which makes water marbling excellent for beginners. Water marble nails are done with regular nail polish. All you’ll need are a few manicure tools, four (or more) polish colors, and a cup of water. Note that this approach won’t work with gel polishes or acrylic powders. Here’s how to do it:
Get your nails looking flawless with just a few taps. Book your next nail appointment effortlessly
- Prep your nails first. Like any manicure type, you’ll have to lay the groundwork before tackling design aspects. Cleanse your nails thoroughly, remove old polish, shape your nails, and push the cuticles back. You can also add cuticle oil for extra hydration.
- Apply the base coat. Paint your nails with the color you want to use as the base for your marble nails. Two thin coats are the optimum amount. Make sure you give your nails time to dry thoroughly between layers.
- Prepare your marble nail polish workstation. After your nails have dried, fill a cup with room-temperature water. Using room-temperature water is key since cold water can cause the polish to harden too quickly. Select at least three nail polish colors different from your base color, unscrew the caps, and set them aside.
- Create the nail polish marble design. Hold the nail polish brush over the water allowing a few drops to fall in. Repeat with a few drops of the following color and continue to do so until you’ve used all your desired nail polish choices.
- Give it a whirl. Take a toothpick and gently swirl it around in the water. The swirling action creates that unmistakable marble pattern. Get creative and come up with some one-of-a-kind designs. But don’t take too long—the nail polish will begin to dry, so you’ll want to act fast.
- Dip a finger into the water. After you’ve created the perfect marble swirl design, take a finger and dip it in using a scooping motion. While doing this, keep your finger positioned at a 45-degree angle. Repeat on all fingers, doing one nail at a time.
- Clean up the edges. Water marble nails can get messy, but cleanup isn’t difficult. Dip a nail brush or cotton swab into nail polish remover to trace the skin around the nail. Do this carefully to avoid messing up your manicure.
- Seal it with a top coat. One final step to seal the deal is to swipe your nails with a top coat to prevent chipping and give your nails an added layer of shine. After they’ve dried, you can apply a dollop of cuticle oil to promote healthy and hydrated cuticles.
Marble gel nails
If you want to up the ante on durability and make your marble nails last longer, you can get the marbled look with gel polish. The process for how to do marble gel nails is different than the water marbling technique. Executing the marble effect on gel nails is a bit more involved and time-consuming. But advanced artistic talent isn’t needed, just a few gel polish colors, a nail lamp, patience, and a steady hand. This is how to do marble nails with gel polish like a seasoned nail tech:
- Start with a clean slate. Do all the necessary prep work, from cleaning beneath your nails to filing them into your desired shape. This step is essential across all manicure types before getting into the marbling technique.
- Apply a base and the base color. Paint your nails with a gel base coat and cure them under UV or LED light. After that, paint your nails with two coats of your chosen base color, hardening each layer under the lamp.
- Arrange your color palette. Drop a dab of the polish colors you’ll use onto a small dish or plastic tray. Place each color separately, away from each other, so that the polishes aren’t touching.
- Start painting. Dip a nail art brush into one of the polish colors. Apply it onto your nail by drawing a squiggled line vertically across the nail—it doesn’t have to be perfect, and a little goopiness is ideal. Then, rinse your nail brush and dip it into your next color. Draw with the second color by outlining both sides of the first squiggle. Repeat with the third color and once more with the first color.
- Swivel through with a clean brush. Grab a new brush and drag the tip across your nail in an S-like motion at an angle. Start at the bottom of the nail and work your way up to the nail’s edge to create a marble gel nail polish design. Continue with this brush stroke, so the marble effect spreads across the entire nail. Cure under UV light.
- Seal it with a top coat. Apply a layer of top coat to your freshly painted marble nails with gel polish. Let them harden under the nail lamp one final time to set the look.
Marble acrylic nails
For those loyal to acrylics, marble effect acrylic nails have their own application process using dip powders. Like marbled gel nails, marble acrylics take some extra skill and precision. But they’re still relatively easy to do on your own if you have the proper technique. Form and prep your acrylic extensions first. Swipe a dab of primer onto the natural nail plate. Then, use these steps to create your marble-patterned design:
- Gather your supplies. After thoroughly prepping your nails, assemble your three dip powder colors and acrylic monomer. Have your brush ready and jump right into painting.
- Paint with your powders. Saturate your brush with the liquid monomer solution. Next, dip the brush into each of the three powders. Transfer the acrylic from your brush to your nail and swirl the colors around as you apply it. Repeat this step until you’ve covered all the bare areas of the nail.
- Apply a transparent layer. Once you’re happy with your acrylic marble design, dip a clean brush into the monomer, then the clear acrylic powder and build it onto your nail. Give your nails time to dry fully before moving on.
- File and shape. Using a nail file, give your nails the shape you want. Lightly buff down the top of the nail to create and smooth surface and clean up around the cuticle area.
- Finish with a top coat. To set your acrylic nails and give them lots of shine, finish your manicure by painting on a layer of top coat. Add some cuticle serum to hydrate your nail beds to lock in hydration.